Tuesday, March 19, 2013

Expecting Wonders: How to Test Your Seeds Before You Plant

I'm not the most organized of people. I'm sure there are gardeners out there who have their packets of seeds in special containers, organized into groups, stored at the perfect temperature, and everything is carefully labeled.


Honestly, I'm just glad that my seed packets are located one in place for a change.

The problem is that with this jumble of packets of seeds, it's easy to lose track of what I've got. There are folded up packets at the bottom, the leftovers from a few seasons ago. There are seeds in a zipper bag with only "Swiss chard" written on it. I have tomato seeds I saved from the yellow heirloom ones my mom grew -- seeing as it's my first time ever trying to save tomato seeds (I always just bought tomato transplants until last year when I grew tomatoes from seed), I've been a little worried that I messed up and they won't work. And even the seeds that are still in their packets from last year, I still wonder if they've been store correctly and if they're still viable (some seeds, like spinach, are called 'short-lived seeds' and are considered to only be good for one season).

Frugal gardener that I am, I just can't bring myself to throw out the seeds in question. There's so much potential in those little seeds. At the same time, I don't want to plant them and waste time with seeds that aren't going to grow. What's a frugal, sometimes disorganized gardener to do?

Test them. Testing for seed germination is so easy and takes only a couple days (a week at the very most) to do.


To test your seeds, you only need four things: seeds, paper towels, plastic zipper bags, and water.


Moisten the paper towel -- the towel should be wet (not too dry but not dripping, either). Put ten seeds on that paper towel, being sure to space them out.

Why ten seeds? It gives you a better idea how viable the whole package is. According to a post I read about seed germination, if 9-10 seeds sprout, plant your seeds as the packet instructions direct. If only 8 sprout, you've still got a pretty good chance they'll work out. If you get only 6-7 seeds to sprout, you may want to sow more seeds than directed as a back-up. If you get five or less seeds sprouting, buy new seeds.


Fold the paper towel over the seeds, then fold again. Put the folded paper towel into a zipper bag; seal it only partially. If you are testing out multiple seed varieties,  it's a good idea to label the bags.

Put the bags in a warm and sunny location (though not in direct sunlight) for a couple days. If the paper towel starts to dry out at any point, re-moisten it (I used a spray bottle).

After two days on my countertop, my peas looked like this:


Some were further along than others, but they were all starting to sprout. I'm planting my peas (including the ones I used in my test) this week!


If your seeds don't sprout in 2-3 days, don't give up! A few of my seeds (like the Swiss chard and spinach) took a little longer; the tomato seeds I'd saved from last year took about a week for one to even start sprouting (most of the others followed soon after).

Maybe this is the over-zealous gardener in me talking, but seed testing is fun, good for the soul even --especially at this time of year. It's exciting to see life return, even if it's wrapped in a paper towel, after the long winter months. It reminds me of that wonderful and oh-so-true quote from Henry David Thoreau: “Though I do not believe that a plant will spring up where no seed has been, I have great faith in a seed. Convince me that you have a seed there, and I am prepared to expect wonders.” 

Wednesday, March 13, 2013

I Made Laundry Detergent! (Again): Easy Homemade Liquid Laundry Detergent

Back in 2010, I made laundry detergent for the first time. I felt so self-sufficient and pioneery. I was amazed that it worked!

Then I stopped using it.

This was due to one factor: I was pregnant. I had made a big batch of detergent using Dr. Bronner's lavender soap and it worked fine. However, as my pregnancy progressed, the smell of lavender made my stomach turn like crazy (probably from grating all that lavender soap during my first trimester). Every time I pulled the container of laundry powder off the shelf and took off the lid, I felt like throwing up. But I couldn't put it in the trash and start with a different scent -- no way was I going to waste a bar of that soap!

So, yeah, it didn't get used for the rest of my pregnancy and once the baby was here, I still didn't use it. I was already getting the detergent at the store for the cloth diapers (I'd read mixed things about using homemade detergents on cloth diapers and didn't want to deal with that). Plus, I was so exhausted and overwhelmed that I just took a break from making detergent. I needed less on my list of things to do. Months later, even though I was taking on some of the things I done regularly before Baby #2 (as well as some new projects), I still just kept on buying the stuff at the store. My baby will be two this month and we just finished up the last of the store-bought detergent.

I've decided, though, to go back to the homemade detergent. I had my washing soda and borax ready to go, as well as a newly purchased bar of Fels-Naptha. But before I unwrapped the soap and pulled out my grater, I decided to look at some of the liquid detergent recipes on Pinterest. Most of them included grating and cooking and five-gallon buckets. Just as I was going to pass on the liquid stuff and stick to the good ol' powder recipe, I saw something different and waaaay easier.

It was a recipe from P. Allen Smith (I love that guy!). His version of liquid detergent couldn't be simpler to make. Seriously -- it takes less than five minutes from start to finish! It also costs much less than store-bought liquid detergent. You can find the video I watched here or you can follow these step-by-step instructions (plus, you'll also find some before-and-after pics like those ones on detergent commercials!):


To make this detergent, you'll need:
  • 3 Tbsp. borax
  • 3 Tbsp. washing soda (NOT baking soda. I used to only be able to find washing soda at Ace Hardware but now that homemade detergent has gotten a little more common, I can find it at Walmart in the laundry aisle.)
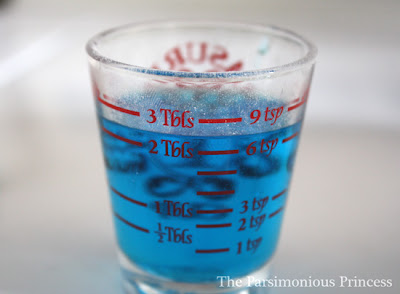
  • 2 Tbsp. Dawn dish soap (the blue original kind)
  • water
  • an empty gallon-size milk jug

Pour the borax and washing soda into the empty milk jug.


Add the blue dish soap to the milk jug.

{Note:  I'm all for using natural cleansers and eco-friendly soaps; it's something I've mentioned a bunch on this blog. I totally get that Dawn dish soap is made from ingredients that aren't exactly "natural" (though it is biodegradable and there are no phosphates in it. Plus, the original blue kind doesn't have triclosan in it, either). I don't use this soap on my dishes, where traces of it could actually be ingested, for that reason. That said, I don't feel too worried about washing my family's clothes with this detergent -- it's a couple tablespoons of Dawn that's been diluted in almost a gallon of water, which will be diluted even further in when you use it in the washing machine.}


Add four cups of lukewarm water to the milk jug.


Put the lid on the jug and shake, shake, shake!


Next, fill it up with water from the tap, leaving just a few inches at the top unfilled. Don't worry about all the bubbles coming out as you fill it.


Put the cap on and give the mixture a shake again. I also just turned it upside to help the detergent mixture mix with the water.


Ta-da! Liquid laundry detergent! You could store your detergent in a fancy glass canister or in something with a creative label on it like I've seen on Pinterest or you could go my route: keep it in the milk jug and write on it with a Sharpie.

For each load, use anywhere from 1/2 cup to a full cup of detergent (it all depends on load size. I've been using a cup for all my large loads of laundry). A cup of detergent seems like a lot but since it's so thin and watery, you need to use more. Since it's so quick and easy to make, it's not a big deal that you use so much at a time, I think.

You might be asking now, "So does it actually work?"


I'm pretty sure that is chocolate on my six-year-old's shirt (a souvenir from my in-laws from their trip to South America last year) -- at least I think it is. Anyway, here's what it looked like before. I didn't do any sort of stain removal treatment before throwing it into the wash.


It works! The shirt came out of the wash as clean as ever. I also checked on some other clothes that had mud on them (welcome, spring!) and food stains and the detergent worked on them, too. (Sidenote: I haven't used this detergent with cloth diapers yet. Washing cloth diapers is a whole other topic. I've been using a detergent specifically for cloth diapers. I'll let you know what is if it keeps on working as well as it has). All in all, I'm pretty pleased with this new laundry room development.

Hooray for homemade detergent -- especially when you can make it in just a few minutes!


Note: I have not received any compensation for writing this post. I have no material connection to the brands, products, or services that I have disclosed.

{This post is linked up to Homestead Barn Hop.}
Related Posts with Thumbnails